1

Prepare environment

MarketMakingApp is a market-making bot that runs on your server or VPS. You can rent a server from DigitalOcean, Ramnode, OVH, Scaleway, Hetzner, Hostinger, or another provider you trust. Choose a configuration: Ubuntu 22/24, 3 CPU, 4 GB RAM, 100 GB SSD.

Install MongoDB as root user.

Create a user to install the bot; we called it adamant in our example. Install Nodejs 18 hydrogen and pm2 process manager for it. This can be done by running the ADAMANT node installation script or separately. In the first case, interaction with the bot will be faster.


2

Install the bot from the repository

Now, you can install the bot program.

Select user adamant:

su - adamant

Download the bot code from GitHub:

git clone https://github.com/Adamant-im/adamant-tradebot.git

Go to the bot directory:

cd ./adamant-tradebot

Install dependencies:

npm i

Ready.


3

Create accounts to manage the bot

You control the bot with commands in the ADAMANT blockchain messenger. The dialogue is encrypted, protected from interference by outsiders, and does not reveal the bot server's IP address.

Create two messenger accounts — one for the bot and one for yourself: https://msg.adamant.im (Clear-web) or http://adamant6457join2rxdkr2y7iqatar7n4n72lordxeknj435i4cjhpyd.onion (Tor application). Get free tokens on both accounts. See How to use a messenger on the blockchain.

As a result, you will have two ADM addresses and two passphrases for them, for example:

Account-1 for the bot:

  • Address U7845253844178751258
  • Passphrase "record pill lizard broom student.."

Account-2 for you:

  • Address U1470193608913646963
  • Passphrase "normal fatigue lawn timber round.."

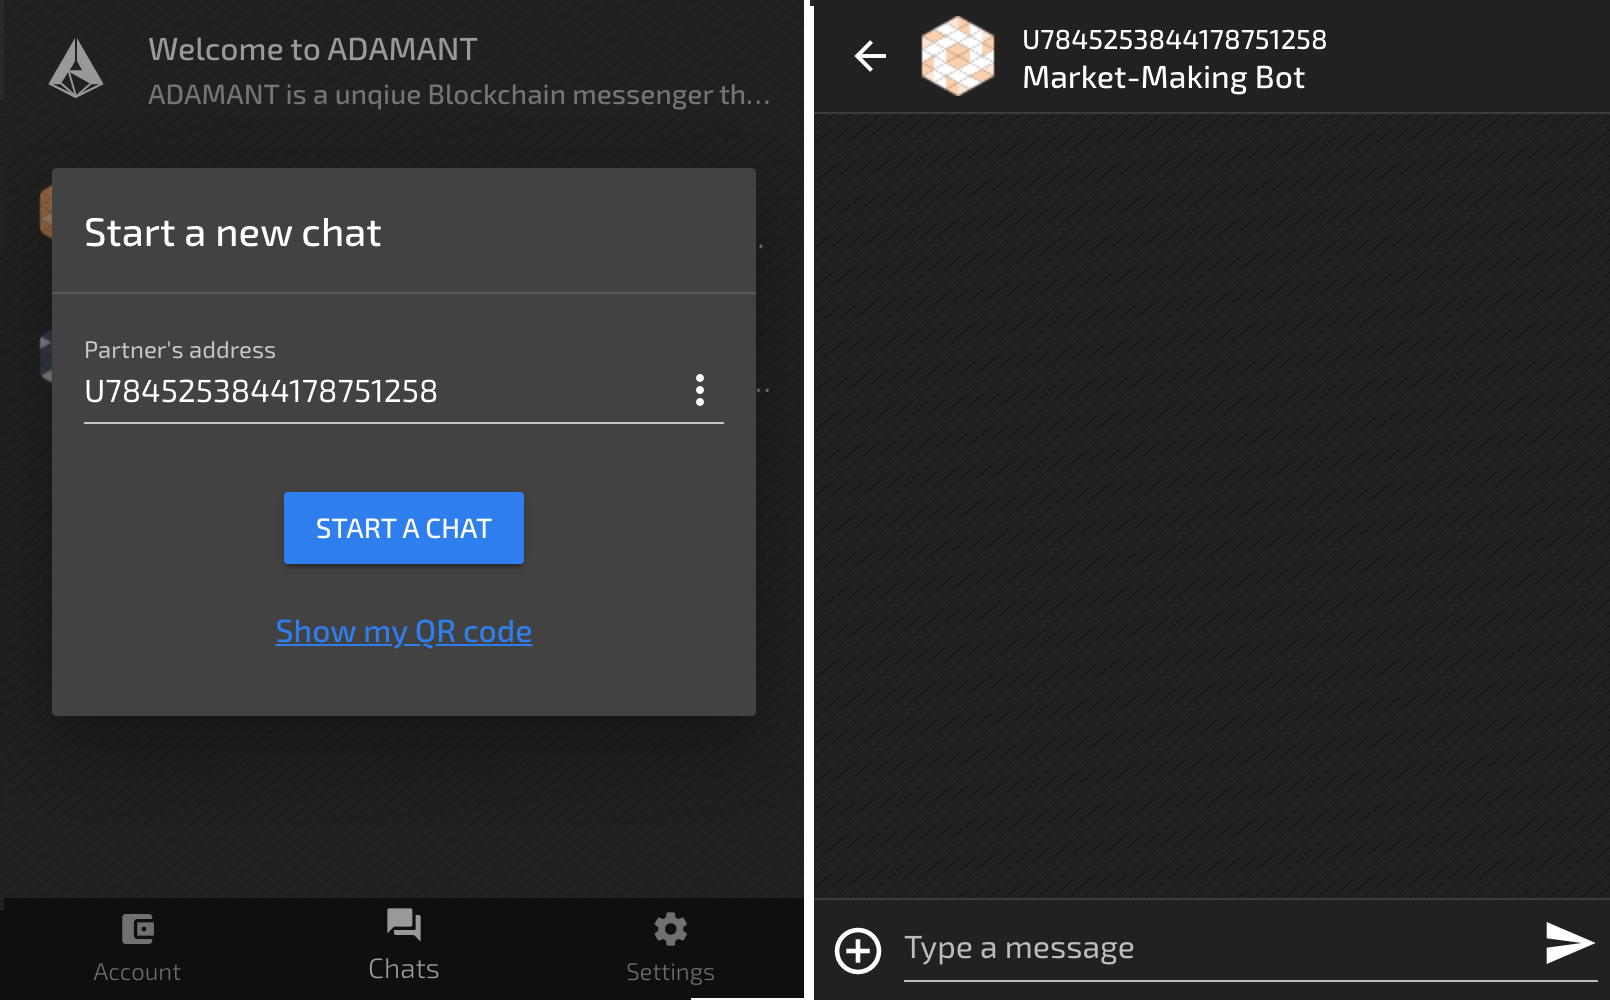
The bot will use the first account, and you will send commands to it from the second. Therefore, open the messenger and log in to Account-2. Add a dialogue with your bot and give it a name. The application with Account-1 does not need to be opened — you add Account-1 to the configuration file below.

Each message you send to the bot and from the bot to you costs 0.001 ADM. The free tokens are enough for testing, and then you can exchange USDT for ADM on exchanges. For a year, 50 ADM on each account is enough.


4

Create API keys on the exchange

The bot works with your account's application program interface (API) to receive information about current orders and place new ones. Therefore, create an account on the exchange and top up your token and USDT/BTC balances.

To obtain API keys, create them in your account. For example, on the XeggeX exchange, the URL is https://xeggex.com/account/apikeys. You will receive apikey and apisecret. Some exchanges also have a trading password, apipassword.

When choosing permissions for API keys, specify read and trade; do not give withdrawal permissions for security reasons.


5

Fill in the config file

Go back to the server. Navigate to the directory with the bot:

cd ./adamant-tradebot

Create a bot configuration file by copying the default one:

cp config.default.jsonc config.jsonc

Open the config in the nano editor:

nano config.jsonc

Specify the main parameters:

passPhrase Passphrase of the bot account (Account-1). Example:

"passPhrase": "record pill lizard broom student..",

admin_accounts Bot administrator accounts. There may be several of them, but you will indicate only one (Account-2):

"admin_accounts": [
"U1470193608913646963"
],

exchange and pair Specify on which exchange and with which trading pair the market-making bot will work. Example:

"exchange": "XeggeX",

"pair": "TOKEN/USDT",

apikey, apisecret, apipassword Specify the exchange API keys:

"apikey": "0d5sfswsseef63a104f3adf965",

"apisecret": "8JBSQexbvi5wAaMB9ouEjzgTEXHj0qKmn2WIgve4Jajq",

"apipassword": "",

adamant_notify and/or slack Although not required, we recommend providing an ADAMANT address or Slack hook for notifications. If you want to receive notifications in ADAMANT, create a third account for this.

Keep other parameters default — you can do this later. To save changes in the nano editor, press F2, y, Enter.


6

Run the bot

To run the bot, we recommend using the pm2 process manager.

Launch the bot as adamant:

pm2 start --name tradebot app.js

View the bot logs with the command:

pm2 logs tradebot

If the bot has run correctly, you will see something like:

Trade Bot started for address U7845253844178751258 (ver. 6.0.0).

To exit log viewing, press Ctrl^C.

Ensure your bot is working well — write /help, and the bot will respond with a welcome message. Command /balances and the bot will show your balances on the exchange:

StakeCube balances:
254.84724358 USDT
3 633.2017256 DOGE
Total holdings ~ 516.73 USD or 0.01911908 BTC
Total holdings (non-DOGE) ~ 255.1 USD or 0.00943878 BTC
Changes in 14 mins:
USDT: −0.05650242
DOGE: −0.7790744
Total holdings +0.4 USD or +0.00001471 BTC
Total holdings (non-DOGE) +0.2 USD or +0.00000734 BTC
[Can be wrong] I've sold 0.77907 DOGE at 0.2546 USDT price.

If the bot does not respond, look at the logs.

To make the bot work even after the server reboot, configure pm2 startup.

After you finish with the bot installation, go ahead with the Quick start guide—you’ll learn market-making basics and the bot will execute your first commands.

Quick start guide